
Animate elements and add slide transitions
Updated last month
Animate elements so they arrive one at a time, and set the transition that plays between slides. Both live in the Animations panel in the editor. Presentations you generate come animated already, so this is usually a matter of changing an effect, retiming it, or reordering the sequence — slides you add yourself start with no animations and are built up the same way.
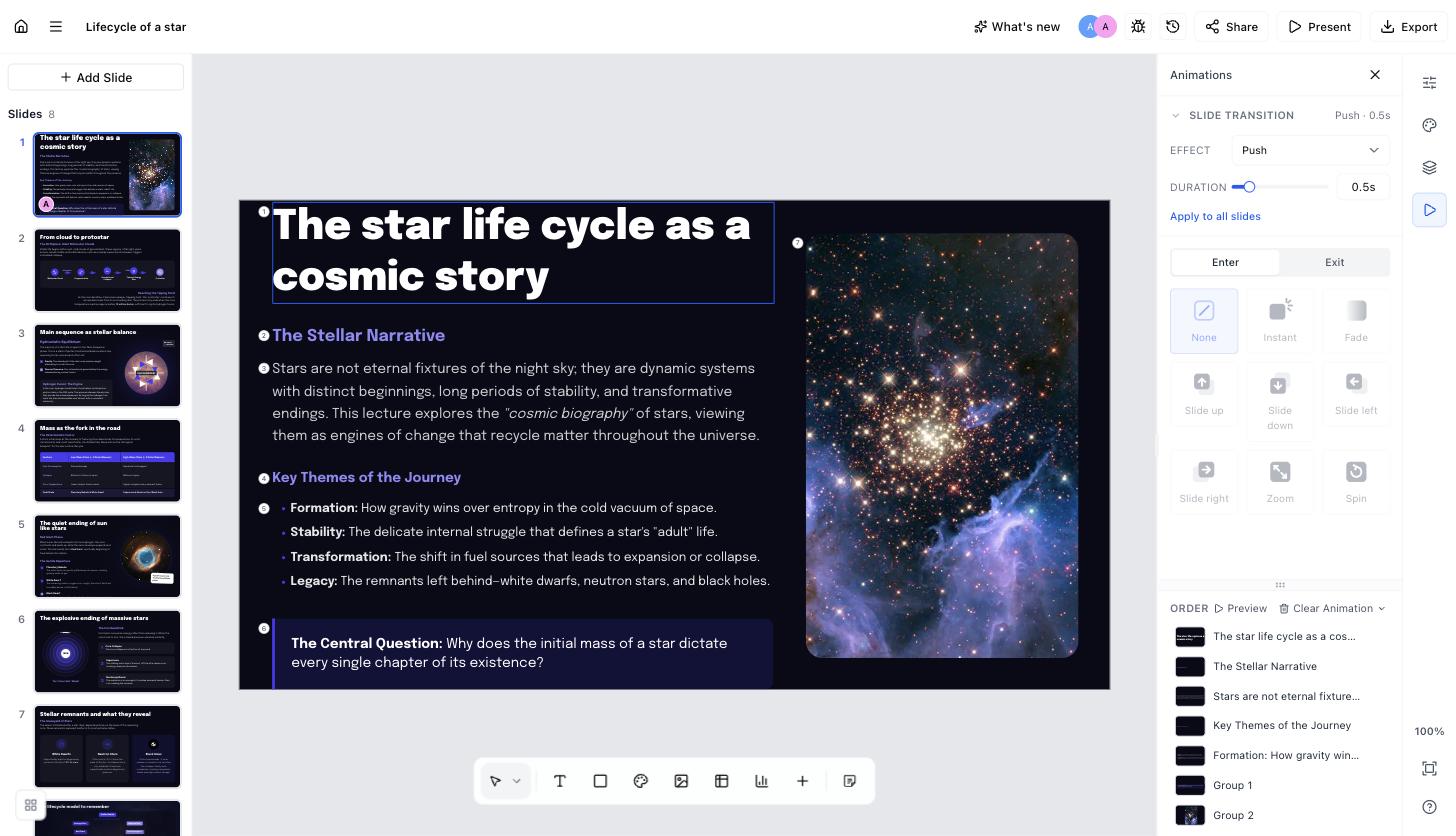
See what's animated on a slide
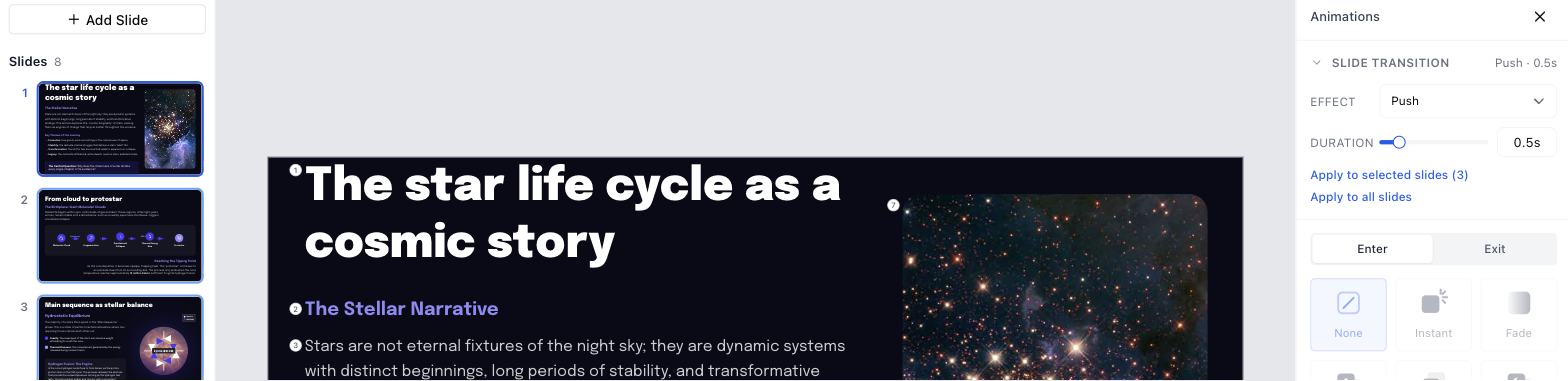
Numbered badges on the canvas mark every animated element and show the order it plays in.
Open your presentation in the editor.
Click Animations in the icon rail on the right edge.
Click Preview above the order list to play the slide without leaving the editor.
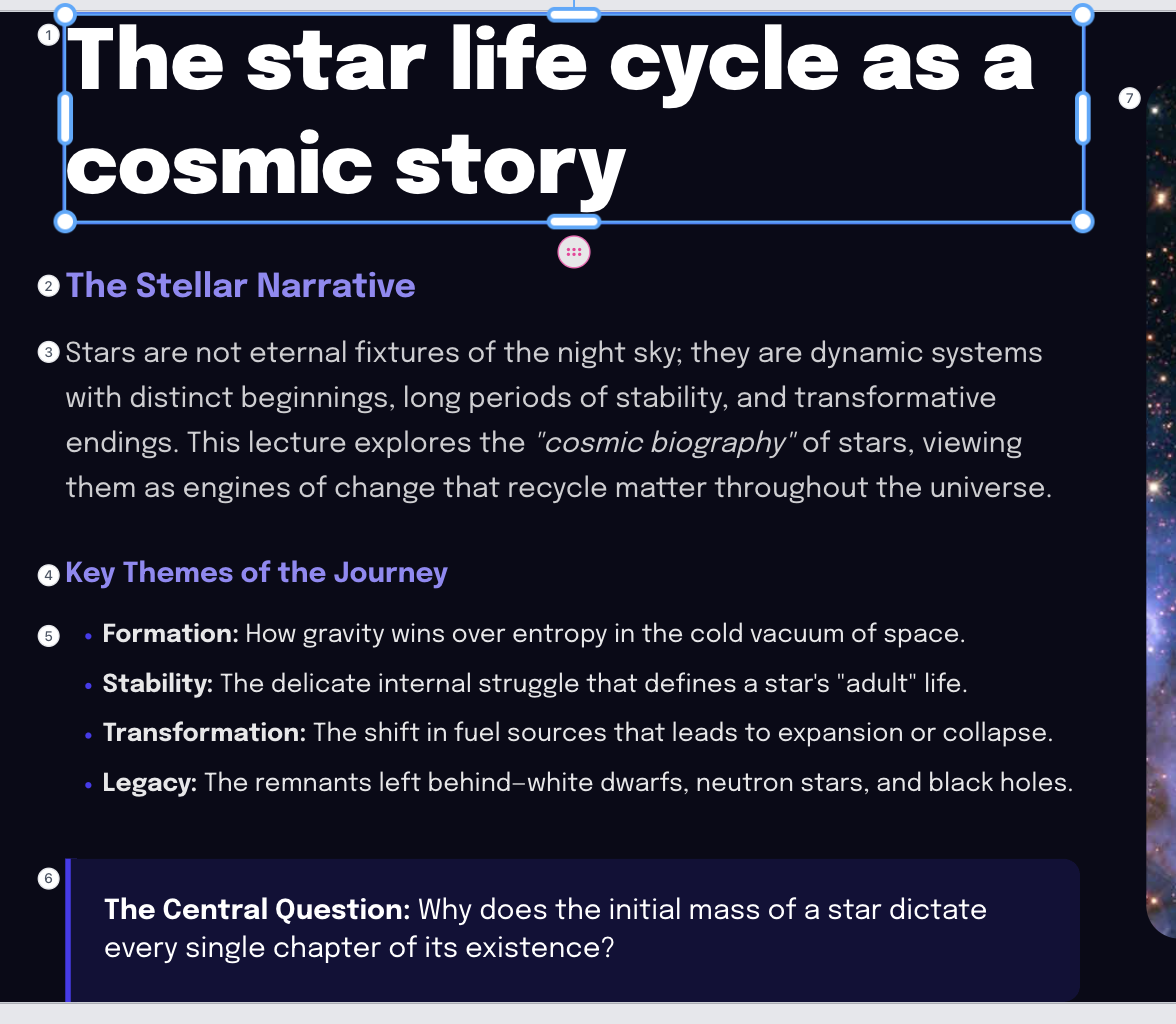
The panel has three parts: the slide transition at the top, the effect gallery in the middle, and the playback order at the bottom. Hovering a row in the order list highlights its element on the canvas, which is the quickest way to tell two similar rows apart.
Change an animation
Each element carries one entrance animation and one exit animation, so picking a new effect replaces the current one rather than stacking a second on top.
Click the element on the canvas, or click its row in the order list.
Choose Enter to change how it arrives, or Exit to change how it leaves.
Hover an effect tile to see it play on that element.
Click the tile to apply it.
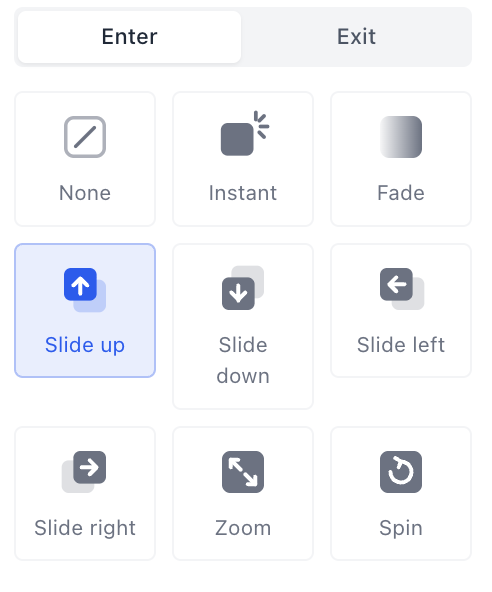
Nine tiles are available in each tab: None, Instant, Fade, Slide up, Slide down, Slide left, Slide right, Zoom and Spin. Instant has no motion — the element switches on or off at its turn in the sequence.
Retime an animation
Timing is edited in the footer at the bottom of the panel, which appears once an element or row is selected.
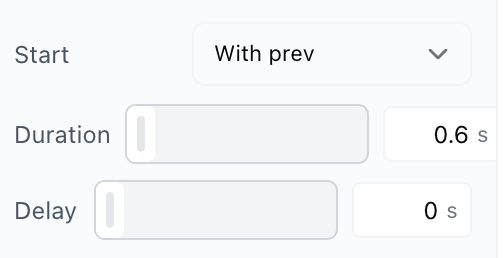
Start — Click waits for you to click or press a key while presenting. With prev plays at the same moment as the animation above it. After prev plays automatically as soon as the one above it finishes.
Duration — how long the effect runs, from 0.1 to 5 seconds.
Delay — a pause before the effect starts, up to 3 seconds.
Select several rows with Cmd-click or Shift-click to retime them together. Fields whose values differ across the selection show a dash until you set a new one.
Reorder the sequence
Animations play top to bottom in the order list, and the canvas badges renumber as you rearrange them.
Drag a row by its handle to a new position.
Click Preview to check the new order.
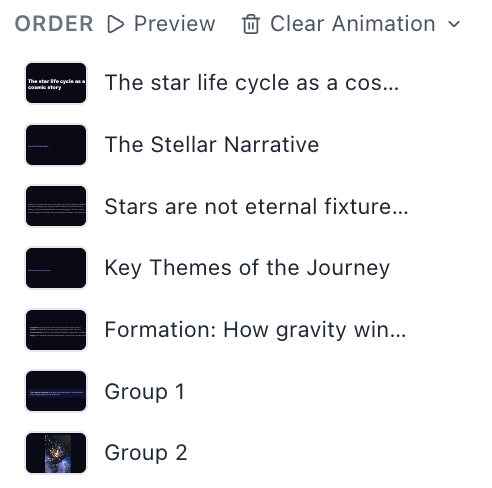
Enter and Exit each have their own list, so switch tabs to reorder the other phase.
Animate a slide you added yourself
Slides you create with Add Slide start with no element animations. They do still use the standard Push transition, so they will not cut abruptly from the slide before.
Click an element on the canvas. Shift-click to add more elements to the selection.
On the Enter tab, click an effect tile.
Repeat for the other elements you want to animate, in the order you want them to appear.
Click Preview to play the slide back.
New animations start on click, so each one waits for you while presenting. To make a group of elements appear together or run on their own, select their rows and change Start to With prev or After prev.
Selecting several elements and picking one effect gives each of them its own animation, ordered top to bottom, then left to right. A group animates as a single unit, and it keeps doing so as you add or remove elements inside it.
Set a slide transition
A transition belongs to the slide you are currently on and plays as you arrive at it. Slides start with a half-second Push.
Open the Slide transition section at the top of the panel.
Pick an Effect: None, Fade, Slide, Push or Zoom.
Set the Duration with the slider, from 0.1 to 3 seconds.
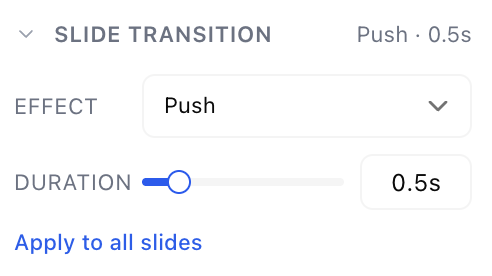
Changing the effect or duration only affects the current slide. To spread it further, use Apply to all slides, or select two or more thumbnails in the sidebar first and use the apply-to-selected action that appears above it.
Present with animations
Click Present in the top bar. The slide transition always finishes before any animation on that slide begins.
If a slide's first animation is set to With prev or After prev, it plays on its own as soon as you arrive. If it is set to Click, the slide waits for you. Clicking or pressing a key steps through the sequence, and once the last step is done the next click moves to the next slide.
Going back to a slide you have already played through leaves it fully revealed rather than replaying it from the start.
If your computer is set to reduce motion, animations and transitions run with no movement — elements appear and disappear instantly. Steps set to Click still wait for you, so your click-through pacing is unchanged.
Remove animations
Removing an animation never removes the element itself.
To clear one element, select it and click the None tile in the tab you want to clear.
To delete specific animations, select their rows in the order list and use the delete action.
To strip a whole slide or the whole deck, open Clear Animation above the order list and choose this slide or all slides. Clearing every slide asks you to confirm first.
Export animated presentations
Animations and transitions are included by default when you export as a PowerPoint file or export to Google Slides. Clear the Include animations and slide transitions checkbox in the export dialog to leave them out and ship a static deck.
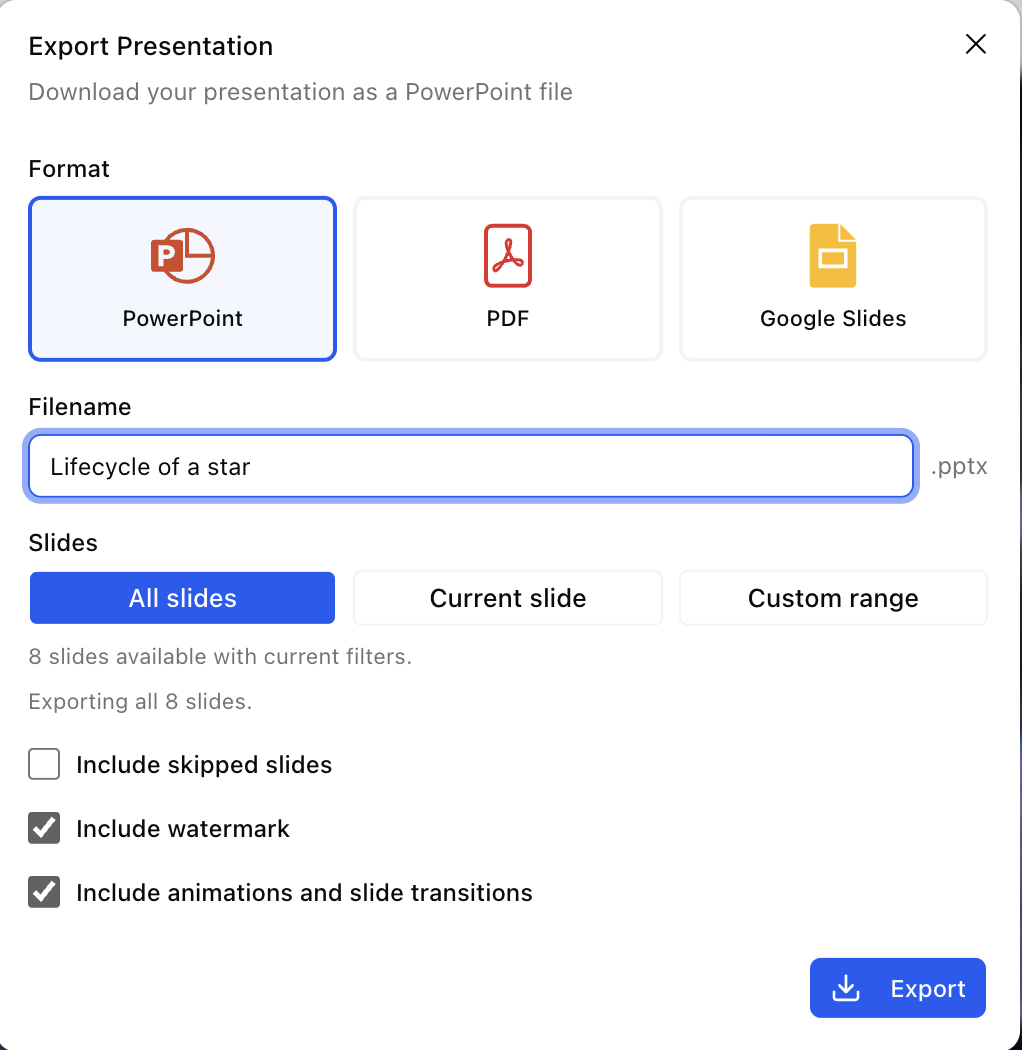
The option does not appear when you export to PDF, because a PDF has no motion to carry.
Google Slides cannot reproduce two of our effects and substitutes a fade for them: the four Slide directions, and the Zoom transition. Everything else maps to its native equivalent. The export dialog warns you when your deck contains slide animations that will be converted.